Learning new things with the clothes show

Hello everybody,

I was wondering what I could post about today and also at the same time trying to learn guitar, which trust me it can be kind of hard to learn new things. I was thinking about ways I can improve and thought I would share my experience with you all in learning new things and my tips for sticking to it. Things can vary from learning to exercise more to learning an instrument. Take these tips as you may and use them for your will.

1. I think this is the most important tip of all. STICK TO IT. If you don’t try you can never succeed and this is a very important thing when you are trying to learn new things

2. STAY POSITIVE. Don’t get yourself down if you can’t learn these things straight away… just use tip #1 and stick to it

3. MAKE THE TIME. If you are having a hectic life like mine then a little therapeutically time to yourself can be a good stress relaxer and by making yourself some extra time you can really buckle down and start learning new things

4.Once you have made the time you can MAKE A ROSTER of when you can practise. You can easily print things of the internet and you can just give your self a smily face sticker when you are done.

5. Reward yourself.  If you are feeling like things aren’t going great and you are still sticking to your schedule and practising hard then reward yourself. Everyone needs a little treat every once in a while


I hope you all learnt something.

XX Georgia

COLD WEATHER WORKOUT WITH THECLOTHESSHOW

Hello!

Today I thought I would share with you what I wear to the gym (when I get the rare chance) or when I go for a run and whenever  I feel like exercising


Screen Shot 2014-07-29 at 5.21.21 pm


COLD WEATHER WORKOUT

For runners I  have chosen to use Nike Free. The Nike website is great for ordering online because before you order it you can customise it with your own colours and personalise it.

For pants I have chosen adidas leggings which help to keep you nice and warm but also let your legs breathe. Compression leggings are also fantastic for burning fat and when you are exercising.

For Tee-shirt I have chosen this hamsa print tank. You can use pretty much any tank or tee-shirt you have lying around the house. In the cold weather you aren’t going to see it very often because you will likely have a warm jacket or jumper on top

For Jumpers I have chosen a coral coloured Nike hoodie. They keep you nice and warm when you have finished your workout or run

For Extra warmth I chose to add a puffer vest. These are great for working out in because they leave room for your arms to move but keep you nice and toastie when the weather starts getting colder.

For Hydration I think a good water bottle, I got mine from http://www.cottonon.com, and water is the best possible option but for days when you want to spice things up a bit a nice tea or sugar free iced tea can be a great addition

For Accessories I have added some emijay hair ties that keep your hair crease free and cute as while you run, so even when you are dripping in sweat you will always have a-dor-able hair

For a Yoga Mat I found this one at ogorgeous.com and this is actually Blogilates own shop. The mats all have their own individual motivational quote on them. Blogilates is a really good youtube channel which helps you get fit when a gym isn’t nearby. I always find myself inspired after I watch her videos

I hope your feeling ready to go get fit with me now

Thanks, Georgia

DIY Room Decor Silhouette

Hey guys,

Ok so heres the deal: Every week or whenever I get the chance or eensy meansy little tid-bit of time I will do a DIY project to spice up my room a little.

I was just doing a deco when I thought about adding it to my blog!

I took a few pictures to share with you so lets get started

You will needDSC_0234

-Paper

-Printer

– Scissors

– Frame

-Texta’s/watercolours/coloured pencils etc,

– Pencil

– Fineliner

– Texta (One colour that matches fine liner)

– Silhouette

Heres how to do it

step 1.
Find a picture of a silhouette on the internet and print it off,

A few suggestions could include,

• Disney characters

• love hearts or any shapes you fancy

• If it is around christmas you could do christmas trees or a wreath

• If it is around Easter you could use an easter egg

It is entirely up to you what you choose.


Step 2.

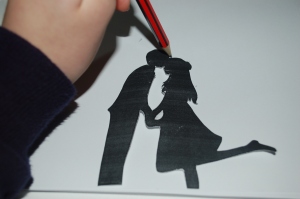
Cut out your silhouette and trace around it onto a sheet of paper. DSC_0218  DSC_0220 DSC_0222


Step 3.

Colour in what you traced however you like.

DSC_0223 DSC_0224

Step 4.

Use your textas or pencils or you can even cut out shapes from other pieces of paper to create a design in the background. I drew love hearts as I was going for a valentines day lookDSC_0226 DSC_0227

Step  5.

You can display it in a frame that you can easily find at the dollar store. Now you’re done!

Heres how mine turned out.DSC_0233
DSC_0231

Hope you enjoyed!

Seeya Thursday,

Georgia

Maybelline Dream Fresh BB Cream | REVIEW |

Hello Hello,
How are you going?
Today I thought I would share with you all a REVIEW!
I am super excited to post this today because (a) I have never done a review before and (b) I am in love with this product!
I will be reviewing the
Maybelline Dream Fresh 8 in 1 BB CreamScreen Shot 2014-07-19 at 10.51.33 am
This product is only come about in the past few years to the makeup realm. It has had lots of rave since the much loved BB cream has come out. I always wanted to know if it was worth all the hype surrounding this product. Short answer: YESSS!!!! DSC_0201
Long Answer:
COVERAGE: Much alike the tinted moisturisers you can find everywhere now this product has a light coverage for days when being all made up is not in your fancy. If you feel this does not give you enough coverage as like I have mentioned, It is not a foundation but instead a BB cream. You can put a pressed powder or loose powder overtop and you can use the BB cream as a sort of primer which will give you much more coverage.DSC_0213

DSC_0215
FEELS LIKE: AIR! I mean this unlike foundation feels like you aren't wearing any makeup at all! DSC_0208
SMELLS LIKE: This product has minimal to no scent at all which I find very pleasing!  I have always found it rather off putting when a product has a scent as usually it smells gross.
LOOKS LIKE: The look of this product is very natural around your skin and gives you an even and light coverage to even out skin tones which have been all over the place. DSC_0211

DSC_0214
LASTS FOR:  The only problem I have found about this product is that it tends to fade into your skin after a few hours and then you have to go and apply some more. This could have something to do with the formulation it is made up with or it could just be my skin which usually soaks up product like there is no tomorrow.
CLAIMS TO: On the product it claims to give you an "Instant fresh-faced glow without looking all made up. Our gel based formula enhances skin with 8 benefits in 1."- Maybelline New York
The Benefits are
1. √"Fresh, Lightweight feel" [TICK]
2. "Blurs Imperfections" [To  moderate degree]
3.√ "Enhances" [TICK]
4. "Brightens" [To a moderate degree
5.  "Hydrates all day" [No]
6. √ "Visibly smoothes skin" [TICK]
7.  √"Adjusts to skin tone" [TICK]
8. √ "Oil free" [TICK] DSC_0206
PACKAGING: The packaging of this product is very cute and is great because at the store when you go to buy it you can tell it apart from all the other colours because the top of the bottle the colour changes depending on what skin tone you buy. I use the colour 'LIGHT' DSC_0207

DSC_0216

DSC_0200
APPLICATION: the product says to " Apply a thin layer onto skin." I tried this and found that I had to use a lot of product just to cover my face and then it looked very cake like so I added a dab of moisturiser when I applied the cream and mixed them together. I found this gave it a much more even and easy application. I use either a Beauty  Blender© or my hands. I find using my hands is much quicker but using my Beauty Blender©  gives it a much more even and natural look. DSC_0209

DSC_0210

I think that wraps up my review. Hope you enjoyed, Seeya Sunday
Georgia

DIY CHALKBOARD JARS

DIY Chalkboard Jars

DSC_0199

Today I thought I would share with you guys how to make DIY chalkboard jars. First of all I would like to say that I did not come up with this idea and in fact my very talented mother did.
These jars are great for storing things in. I use them for storing pens and pencils in but you can use them for a wide variety of things including those pesky hair ties and bobby pins that ALWAYS go missing. 

What you will need:
  • Masking Tape
  • Blade
  • Brush
  • Chalkboard paint (found at craft stores and paint shops)
  • Old jars (washed and dried with all labels peeled off)
  • Hairdryer (optional
  • Newspaper
  • Chalk (Of course!)DSC_0158
The Method:
  1.  Cover your surface with newspaper. I recommend not doing this activity on carpet or else you could end up with black carpet instead of white.
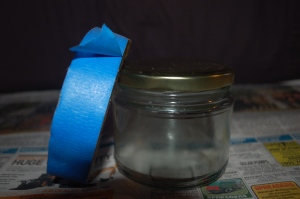
  2. Get your jar and masking tape and tape out a square in the jar. It's easier to do a square but as you try this more and more you can try other shapes like love hearts, triangles and whatever shape your heart desires.DSC_0162DSC_0164DSC_0171DSC_0168
  3. Use your brush and apply some chalkboard paint inside the square you taped earlier. Make sure to use nice and even strokes to ensure the paint is applied evenly. You can do the same to the lid of your jar until it is completely covered. I chose not to paint the lid on my triangle jar because I liked the effect of the gold lid. If you have a lid with no previous labelling on it, it's completely up to you to decide whether or not you paint it.DSC_0165DSC_0167DSC_0170
  4. If you are inpatient like me you can use your hairdryer to dry off the paint quicker.DSC_0173
  5. Once all of the paint is dry you might have to go over it for a second time depending on how much paint you put on last time.DSC_0177
  6. Make sure your second coat is dry and then you can carefully peel off the tape.DSC_0180DSC_0181DSC_0186
  7. After you have taken off the masking tape you might find that some of the paint has gone over the side so an easy solution is to use your nail or a blade from an exacto knife and just scrape off the parts you don't wantDSC_0185DSC_0191DSC_0190
  8. Now you're done. You can use these jars to store anything you fancy in. I am going to use the jars I just made to store hair ties and bobby pins! Here are the results from what I made. They look adorable next to my rapidly growing collection.

DSC_0194DSC_0197


My Everyday Hair Care Routine

Peekaboo?

Hey Guys,

Today I thought I would share with you my everyday hair care routine. Since I had a massive chop to my hair and I cut off all the old and dead hair I have established a hair care routine every night and morning so my hair does not get as damaged as it was. I have also learnt many new things in the process about taking care of your very precious hair.

The Products:

DSC_0155


The Products I use on my hair are:

Kevin Murphy leave in luxury  –  Leave In Conditioner

TRESemmé Platinum Strength – Heat Protectant

Loreal Paris Total Repair Pro keratin+ Ceramide  – Leave in conditioner

Thick Bristles Brush

Everyday Hairbrush

Schwarzkopf Extra Care Super Styling Lacquer- Hair Spray

The Routine:

1.

First of all after I have had my shower and washed my hair I start off with my Kevin Murphy leave in conditioner

DSC_0148

This conditioner has special silk proteins which help soften and moisturise dehydrated and frizzy hair. It also has peruvian bark extract and mango butter which help protect your ends. This is great for coloured hair but seeing as I don’t have coloured hair I just use it for the moisturising and protecting abilities. Not to mention this smells like heaven! There is no other scent like this and I have no idea how to explain it but please just a minute of silence for this heavenliness

I use this conditioner straight after my shower because you have to apply it to damp hair. I usually use this at night because I have more time to spend applying it. I use this on my tips and in small areas in the middle of my hair to tame pesky flyways.I suggest you do not use this on your roots or it will make them oily and unless you have an infinite supply of dry shampoo this is not a great look.

2.

After that I will apply TRESemmé heat protectant and dry my hair

tresemme-B00AE07FQI-1-l


I like to use platinum strength because my hair gets damaged VERRYYY easily and this just helps to ensure I am not causing any breakage while I blow-dry my hair. When I can I like to skip this part because it is good to give your hair a break from heat as this damages hair.

3.

The next thing I do after I have made sure my hair is completely dry is, I brush through it with my thick bristles brush to get rid of any clumps in the length of my hair and I will then go over it and use my everyday brush. I use this brush and I massage the roots to stimulate the blood cells which encourages new hair follicles to grow- In other words it just helps your hair to grow faster.

DSC_0145 DSC_0144


4.

The second last thing I do is apply L’Oréal Paris Elvive Conditioning spray.

DSC_0150

This repairs and strengthens hair and conditions as well as detangles. It has Keratin in it which is told to do wonders for your hair. I like this product because it is in a handy dandy spray bottle so you don’t have to get your hands all full of product like the Kevin Murphy conditioner. The only reason I continue to use the Kevin Murphy is because of the scent! This Loreal Paris Conditioner is great because you don’t have to apply it to wet hair so it is much more convenient! As you can probably tell I am a BIG fan of leave in conditioners- What can I say? Im obsessed

5.

For the last product I use in my everyday hair routine is Schwarzkopf super styling hairspray. I actually only use this on occasions when I can tell my fly aways are going to bug me.

DSC_0153

The Super Styling Lacquer is great for me because no one likes crunchy hair from using too much hairspray and this is great because it holds shape easily and you don’t have to use a lot of spray. I much prefer this because my hair holds no shape whatsoever and this just gives it that little push to keep it in place for the day.

6.

Finally on certain occasions I will admit that I have resorted to the very trusty dry shampoo. Even though this is not part of my everyday haircare routine I thought it was important to share with you. I use the not your mother’s dry shampoo which I will admit I stole custody of it from my mother (It’s a little ironic isn’t it) This does do wonders when your head all of a sudden decides to go fully blown like an oil slick. Dry shampoo like this helps to soak up all of the grossness in your scalp leaving you feeling fresh for the day ahead of you! I swear if this came in pocket size I would buy the whole rack because this is a great touch up for throughout the day.2234731

Hope you guys enjoyed and maybe learnt a little through this post,

XX Georgia

Upcoming News: I have decided to start posting a new blog post every three to four days so look out for upcoming blog posts in the future.

Styling Skater Dresses

Hey Guys,

I have spent many hours scouring the internet for online deals and staring longingly at them only to count my money and find I have only cents left. Don’t you dare pretend you haven’t done the same! Anyway today I was doing my usual online window shopping and I found the most gorgeous dress you have ever seen. It got me thinking about how I could style it and here is what I have come up with

jdz1385_black

This dress can be found here

It features bold panelling and a gold zipper at the back to add contrast to the monotone colour and skater style skirt, perfect for spinning in. This dress also comes in a blue option and a red option. Both stunning but not nearly as versatile as this little black dress.

Here are some styling options I have come up with

http---static.theiconic.com.au-p-river-island-7479-963541-1

A gold chain or statement necklace like this really adds a pop of wow factor because an all black dress can be rather boring without a nice touch of styling. This particular necklace can be found for $18.95 at http://www.theiconic.com

The next item I would add would be these tights. Word of warning though, these can look tacky during the daytime or in the spring and summer months so stick to these either at night time or autumn/fall and winter

A221415

These sheer tights add a light coverage and add a lot more modesty to your outfit for when you are out to dinner with the family or wherever you might be headed. These tights can be found from target for a cheap $6.75

imagesimages-1Unknown

Any one of these shoes would go great with the dress. These types of pumps can be found everywhere so just take a look in your local shopping mall/centre. I suggest if you are wearing tights go for the black or red shoes and if you aren’t wearing tights go for the black or red pumps. These are a great option for dressing up that little staple item you wear everywhere.

RussianRedBox

Now red lips are not for everyone and with so many different shades and brands and mattes and high gloss that sometimes it is best to just stay away from the whole bold lips scene but with this look they add that extra pop of colour you might need. Pair a matte looking red lipstick (mac offers high quality) with the red pumps and your set. If you do choose to go for the bold lips I recommend keeping face and eye makeup looking minimalistic other wise you are put in danger of crossing the line to clownville and that is NOT a position you want to be put in

That completes the look! Hope you liked,

Georgia

DIY Vanity Container

Do you ever think your vanity is too bland and boring ? Is there never enough space to keep things together and clutter free?

I know that this is always the case at my house. So I came up with a solution.

For this DIY you will need the following-

  • Candle jar with not much left inside
  • Paper towel
  • Ribbon
  • Jewels or embellishments

(please choose one of the following)

  • – Either a larger candle that can stay alight for a while or
  • – A deep pot or dish and water
  • – Microwave

Method- 

If you are using the pot of water method follow these instructions

Step 1 – Set your water up on the stove and add your old candle jar in the middle of the water. Heat it up until the wax melts and use safety mittens to pour the wax out. There should be a small amount left around the sides, if not forget step 2

Step 2- Grab your paper towel and wipe around the excess of the candle jar. Make sure their is no wax left and then use some more paper towel but this time wet it so it is damp and clean off the jar of any grease.

If you are using the microwave follow these instructions

Step 1– Put you jar in the microwave and heat until the wax melts, Pour it out and wipe off any excess with a paper towel. If there is still grease in the jar just dampen the paper towel and wipe around the jar

If you are using a larger candle

Step 1 – Light your large candle and then tip your smaller candle directly above your larger candle upside down. When your wax starts to drip into your other candle make sure that all of the wax is dripping directly into your larger candle. This method is hard to understand unless properly shown so for first timers I suggest you go with either of the other two.

Step 2– Wipe off any excess with your paper towel and if there is left over grease just dampen your paper towel and wipe around your jar.

Method Cont. (follow these steps, it doesn’t matter what method you used)

Step 1  EMBELLISH

Add your favourite jewels, pearls, lace and ribbons to your jar to make it look unique. You can then fill it with whatever takes your fancy and pop it on your vanity.

Here is how mine turned out

DSC_0138

DSC_0136

DSC_0135

Inside I store cotton tips (I’ve forgotten their name ) and cotton balls for removing nail polish and spot removing.


Note- This site and all of the posts/pictures on it are property of theclothesshow.wordpress.com

the clothes show banner

Spring Cleaning- In Autumn

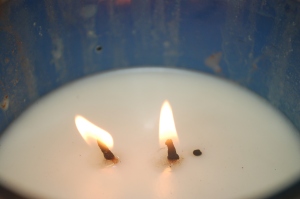
Hi everyone, Today I am going to talk about how I do my spring cleaning. This post has come about because just today I decided to have a nice spring clean ready for my room redecoration in June. The only problem with this was that it was no longer spring (australian seasons) so I therefore have renamed it an autumn clean. First thing I did was light a candle- and even though it is not the most important part of the day it helps to rid the stench of whatever mysteries you might arise while you clean

DSC_0130

Strawberry scented candle

The following step was to find some cleaning materials. Collect the following – Garbage bag – Windex -Feather duster -Cloth – Paper towel Today I was focusing on my bedroom so to make the job seem easier I targeted a small section and then went in a clockwise direction at the other sections. If you are autumn cleaning like me you can section off however you find fit! Now you have your section you need to create 3 piles

  • Trash
  • Keep but put away somewhere else and
  • Keep in the same place.

I sorted out all my items into these piles. If you are doing the same as me make sure that you clean out where it was stored before you put anything back. OK so now you have organised everything into your piles it’s time to use these piles and put things away in their correct places. For the trash pile use your garbage bag you collected earlier and put it in. Make sure you put away the items from your room in their correct places. If you have to leave the room with an item to put it somewhere else in the house i.e the lounge room just leave it outside your door. Now you have cleared that section you can move onto the next. Working in a clockwise direction will help to keep track of what you have and haven’t done. Continue the same steps on all your sections until you are done. Once you have finished, clean  your mirrors and windows with windex and wipe down with a paper towel to prevent streaks.  Wipe down all other surfaces in your room with a damp cloth. You can also put away the items outside your door now and vacuum the room. Also don’t forget to dust down everything. You should be done now! Here is the result of my autumn clean   DSC_0132DSC_0134 Next up I have a lovely little DIY for those who have lots of old candle jars and not anything to do with them. You can even use the candle that you burned today while you autumn cleaned.   This post is property of theclothesshow.wordpress.com       cropped-the-clothes-show-banner.png

Night out

Night out

Oasis faux leather jacket
$96 – oasis-stores.com

Infinity scarf
$41 – kettlewellcolours.co.uk

Iphone case
nastygal.com

Benefit mascara
$32 – johnlewis.com

Nail polish
thebay.com